How to use Media Manager
Last updated more than 2 months ago |
Print
Media Manager is how Essentials handle all the uploaded images, files and linked pages. To access the media manager, go to Managers in the top left corner, and choose Media Manager.

Inside Media Manager you will see all the uploaded files. To upload a new file, go to Select files. This will open a new window, navigate your folders and select the file you want to upload.
NOTE The allowed formats: doc, docx, ppt, pptx, xls, xlsx, dot, dotx, rtf, pdf, txt, csv, jpg, jpeg, jpe, png, gif, bmp, eot, svg, woff, woff2, ttf and otf.

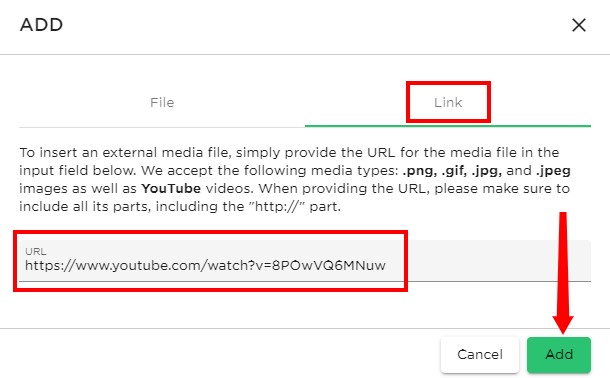
To link a media, for example a YouTube video, go to Link.
This will open a small window where you can paste the URL for the wanted file or YouTube video and click Add.
NOTE To insert an external media file, simply provide the URL for the media file in the input field below. We accept the following media types: .png, .gif, .jpg, and .jpeg images as well as YouTube videos. When providing the URL, please make sure to include all its parts, including the “http://” part.
To share media with other users on your account, select the media and click the Share button.
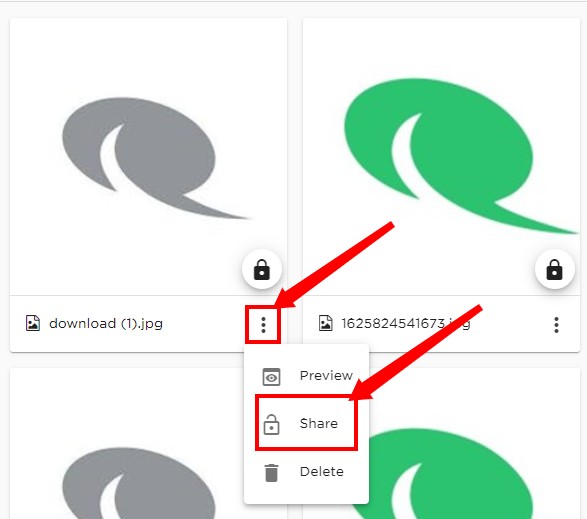
To make a shared media private, select the media and the click the lock icon.

To delete a media, either select the media and press Delete. Or press the garbage bin icon on the media.
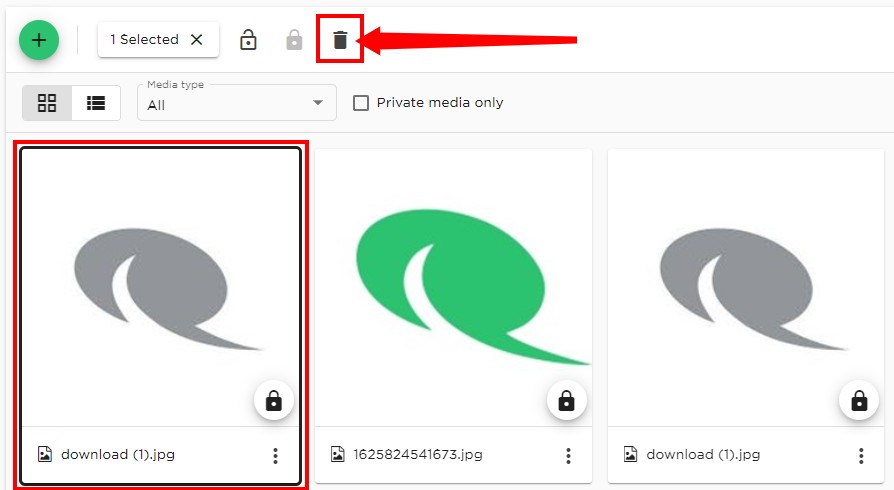
To be able to view all your media in a denser list, select the listing view icon.

If you are looking for a specific type of media e.g. an image. You can get a list of all images by selecting Media Type.